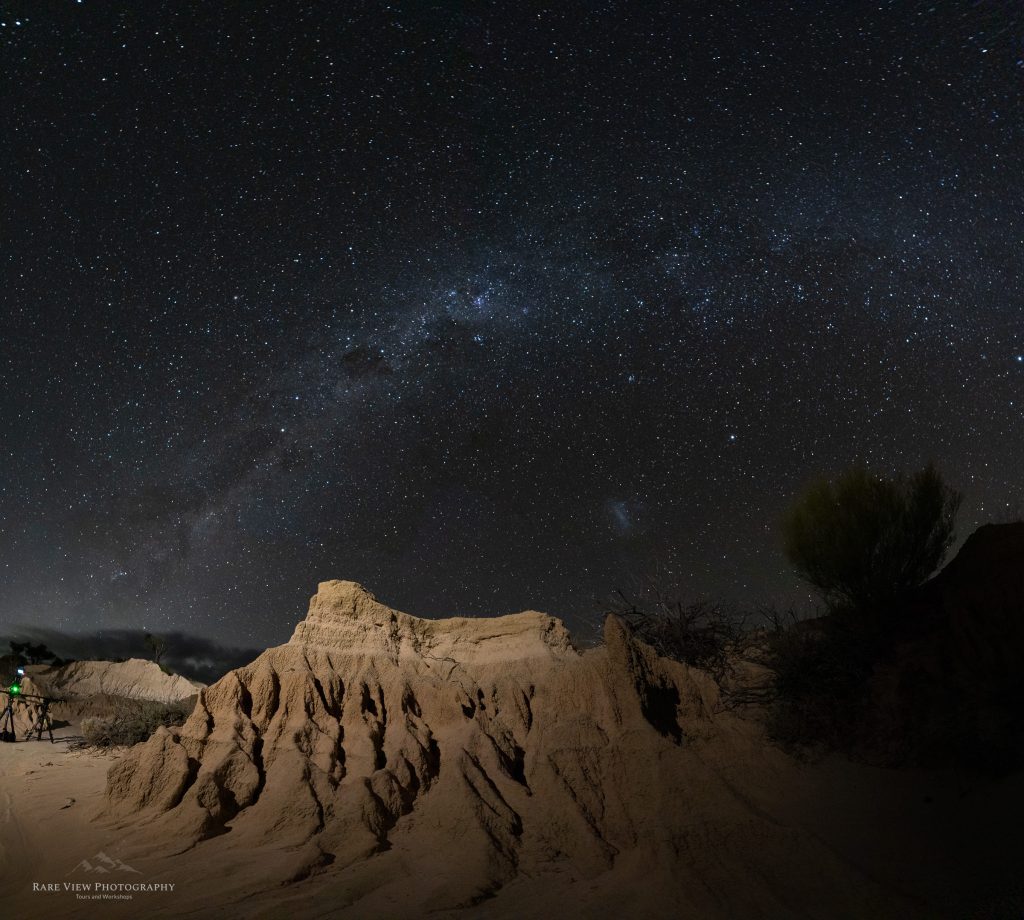
Night Sky Panorama Photography and how to stuff it up! Mungo National Park

Facebook
Twitter
LinkedIn

In my last blog, I gave some training on how to take a night sky panorama. In this blog, I’m going to tell you how to stuff one up! (but hopefully salvage a useable image in the end). To be clear, everything I said in my previous blog is still accurate and valid, but this time I’ll point out a few ways to get it wrong and how to avoid those issues with your night sky panorama photography. 

Scouting a Location

But first, my adventure continued the next day by scouting around the Mungo National Park for good shooting sites for the sunset and night astro. I’d never been to Mungo before so as always, location scouting and assessing locations during the day is paramount! It’s virtually impossible to find a great location and scene in the dark so I spent the entire day creating a plan. 

There were a few unique factors about Mungo that I had to consider. It is a National Park and as such they are trying to show it off and present the unique beauty to the public but at the same time, protect it from the public. I really wanted to get into the best of it but was also determined to do absolutely no damage to the environment. The sculptured rocks are very delicate and even footsteps in the wrong place can damage them. Thankfully the water runoff beds are like concrete and you don’t even leave a footprint. So I specifically walked away from the main viewing platform areas to other less visible areas and also walked a long way down the hill to a suitable water runoff before walking back up the hill to the amazing rock formations. The net result was about a 30 minute walk in to my location and 30 minutes out and I had to do it twice to carry all my photography and timelapse gear. So it was both a workout and very time consuming doing this but I was determined to do the right thing and NOT damage anything during my activities. I did this process for the next 2 nights and am proud to say no one would ever know I was there. Take nothing but photos – leave nothing but footprints – and I didn’t even do that!

Trying Something New

It was also the first time I got to use my brand new Sony A7Rm5 and even tried out the new Focus Bracketing feature. The image below is 10 images captured automatically at increasing focal length and focus blended in Photoshop. 

The Setup

After the sunset, I initially set things up for the time-lapse and while that was running over the next few hours, set about getting some still photos and panoramas. I chose a location intending to capture the rock formation with the Milky Way arching fully over the top of the rocks. The problem was the water course I was in was only about 2m wide so I was only about 3m from the actual rocks. In one way this was good because I was using a 14mm lens loaned to me by Sony and wanted that perspective. The down side was the resulting perspective also made the panorama very distorted and curved. The problem is primarily because the foreground is too close which distorted during the panorama compared to the background.  I shot a 2 row vertical panorama as described in the previous blog.

The Problem

Here is the resulting stitched image direct out of Lightroom. As you can see, it has a very distinctive curve to the rock, the entire horizon is curved like a bowl and the left edge of the MW is actually kicking up at the horizon rather than continuing down per normal. 

You can see my time-lapse rig on the left but that is fine as you always shoot wider than you need as you will lose some during cropping later

Panorama Stuff Up

The other big issue with this raw image is I had used all my lights for the time-lapse setup and so the right side of the image is very dark. I knew this at the time but was hoping I could recover that by lifting the shadows in post but that proved to be a terrible result. I also tried a torch at the time but the colour difference between my LEDS and torch was too much and it just looked unnatural and stupid. 

The Solution

This is what I was stuck with – or was it? How could I possibly salvage this image after all the effort involved (remember the 2 hours of walking I mentioned earlier). It still had some good exposure and the composition was still fine, it was the distortion and uneven lighting that was killing it. 

The 2 answers were cropping and perspective tools. I initially used various distortion and perspective tools to mostly straighten and give a more natural perspective to the scene. This resulted in some pretty strange edges but it didn’t matter as I then cropped out all the unusable scene and reset the composition to get a pleasing result.

Night Sky Panorama

As you can see, it is now in portrait format and is almost a completely new photo. You might even question was it worth doing a pano in the first place. The answer is clearly no but I didn’t know that at the time. So just as you need to be flexible in the field if the scene isn’t what you imagined or the weather is totally different to what you want, you sometimes need to be flexible in the post production as well. Is this my best image, certainly not.  But is it a moderately good and acceptable image, I think so but more importantly it is immeasurably better than the nothing I would have had for all my efforts if I had simply given up on it. 

And the Rest?

And since you are all busting to see how my Time Lapse turned out – (don’t forget to turn your audio on)

However, when I woke up the next morning, I had a little surprise!

If you would like to learn more about this or other techniques, don’t forget I run full Astro Photography Training Courses on a monthly basis. Check out my Astro Photography Training for dates, details and costs.

That’s it for this post. Thanks for following along and you’re welcome to leave a comment or question below. 

More to explorer

Leave a Reply

Your email address will not be published. Required fields are marked *